Photo Corner Cutter Explained: A UK Buyer's Guide
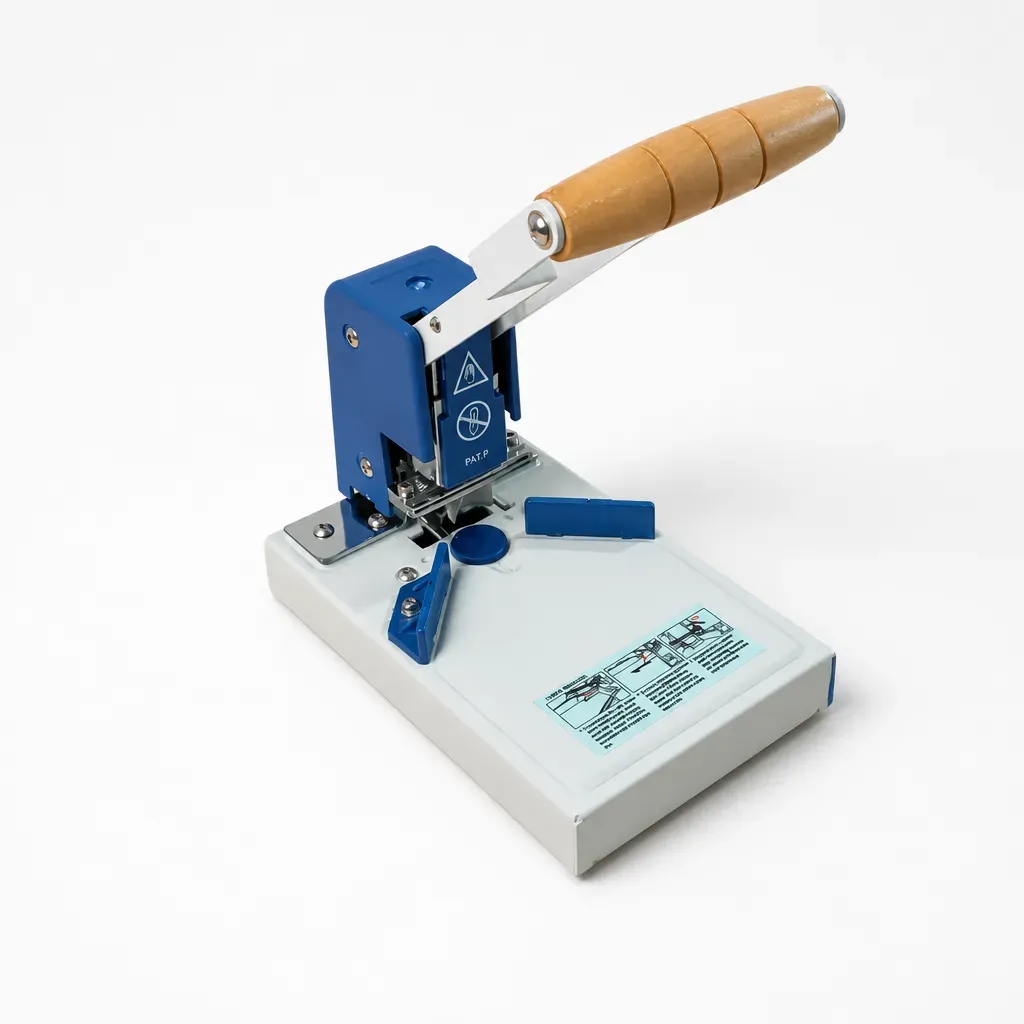
TL;DR: A photo corner cutter is a precision finishing tool designed to trim 90-degree corners of photographic prints, laminated media, and fine art stock into clean radiused curves (typically R3 to R10). Professional models feature hardened steel shear dies to eliminate emulsion fraying, paper burrs, and delamination. For UK photographers and stationers, the 6mm radius (R6) remains the industry benchmark for client presentation.
A photo corner cutter is a specialized post-press finishing tool designed to turn sharp 90-degree corners on photographic prints into smooth, rounded radiuses. Sharp corners on fine art prints, client proofs, and laminated photos are inherently prone to dog-earing, delamination, and premature surface wear. By using a dedicated photo corner cutter, print studios transform raw paper stock into durable, refined keepsakes with smooth, radiused edges. Based on our testing at PageFound, selecting the right cutter depends on blade alloy, shear alignment, and substrate thickness. This guide breaks down the engineering specifications UK photographers and print professionals need to choose the ideal machine.
What Is a Photo Corner Cutter and How Does It Work?
A photo corner cutter is a precision finishing device engineered to trim raw right-angle photo corners into perfectly uniform, curved radiuses. While standard paper guillotines and rotary trimmers handle straight-edge sizing, radiused corners require dedicated curved tooling that applies balanced, multi-directional shear force.
Unlike basic craft punches that squeeze paper against a flat baseplate, professional corner cutters utilise a matched upper male die and lower female anvil. Consequently, as the lever arm descends, the hardened steel blade shears past the counter-blade with minimal clearance—typically under 0.02mm. This scissor-like mechanical action slices cleanly through both the paper base and the photographic emulsion layer simultaneously, thereby eliminating torn fibres or crushed edges.
Furthermore, for UK stationers, commercial printers, and studio photographers, the distinction between cheap squeeze tools and heavy-duty manual machines comes down to leverage and alignment stability. If you are exploring broader machine categories across your workshop, our manual corner rounding machine guide covers the overarching engineering principles behind commercial-grade manual finishing equipment.
Why Does Photographic Paper Require a Specialised Corner Cutter?
Photographic media presents unique physical challenges that standard 80 gsm office paper never encounters. Specifically, traditional wet-process papers, modern inkjet resin-coated (RC) stock, heavy cotton rag baryta (often exceeding 310 gsm), and thermal laminates all behave differently under mechanical stress.
How Does Corner Cutting Prevent Emulsion Delamination and White Fraying?
Inkjet and silver halide photographic papers consist of multiple layers: a paper or synthetic core, polyethylene waterproofing barriers, and an ink-receptive silica or gelatin emulsion coating. When cut with a blunt or misaligned punch, the compressive force separates the top emulsion from the backing board before the blade punctures the base. As a result, an unsightly white fray or ragged lip forms along the curved perimeter.
How Do Corner Cutters Protect Thermal Laminate Seals?
Photographs encapsulated in polyester/EVA thermal laminating film (ranging from 75 to 250 microns per side) require razor-sharp shear cutting. A dull blade pulls the molten adhesive layer, stretching the plastic rather than slicing it. This creates cloudy, unsealed edges where moisture and oils can penetrate over time—a critical failure point for outdoor signage, restaurant menus, and NHS hospital identity badges.
According to UK print finishing quality benchmarks published by the British Printing Industries Federation (BPIF), mechanical punch misalignment and blade deflection account for up to 14% of finishing-stage scrap in boutique short-run print environments, primarily caused by blade deflection on heavy laminated media.
In our PageFound workshop tests, investing in equipment engineered for dense media reliably prevents material waste and costly re-prints. For detailed comparisons on handling rigid board and heavy card stocks, review our companion resource on card corner rounder selection.
What Features Should You Look for in a Professional Photo Corner Cutter?
Evaluating corner cutters requires examining mechanical tolerances, materials, and ergonomic design. Here are the core specifications that separate commercial-grade tools from disposable hobby tools based on our testing.
Hardened Steel Tooling (HRC 55+)
The cutter blade and anvil must be machined from high-grade carbon or tool steel hardened to at least 55 Rockwell C (HRC). Soft zinc alloys or stamped sheet metal blades dull rapidly when cutting abrasive photographic coatings, leading to burrs after just a few dozen cuts.
Rigid Cast Metal Chassis
Deflection is the primary cause of uneven radiuses. Therefore, a solid cast-iron or heavy aluminium alloy base maintains perpendicular alignment between the blade and the cutting deck, ensuring the corner remains square to the print edges regardless of the downward pressure applied.
Machined 90-Degree Side Guides
Accurate corner rounding depends entirely on precise sheet registration. Look for raised, machined metal side stops that securely cradle the corner of the photograph at precisely 90 degrees. Plastic guides with flex or play inevitably lead to lopsided, asymmetrical curves.
Single-Sheet Precision vs Multi-Sheet Stack Capacity
Depending on your order volumes, choose between single-sheet precision trimmers and heavy-duty stack cutters:
- Single-sheet desktop cutters: Ideal for fine art giclée prints, single wedding portraits, and bespoke greeting cards where individual placement accuracy is paramount.
- Multi-sheet manual stack machines: Capable of cutting stacks from 5mm to 10mm (approximately 30 to 80 sheets of 250 gsm photo paper) in a single downward stroke using mechanical compound leverage.
To understand the footprint and workflow differences between portable units and stationary workhorses, explore our breakdown of desktop corner cutter options for UK businesses.
Which Corner Radius Size Is Best for Photos? (R3, R4, R6, or R10)
The radius measurement determines the curvature of the cut corner, measured from the imaginary centre of the circle to its edge in millimetres. In practice, selecting the correct radius depends on the dimensions of the print and the intended aesthetic.
| Radius Size | Curvature (mm) | Recommended Applications | Visual Aesthetic |
|---|---|---|---|
| R3 | 3 mm | Identity cards, wallet photos, business cards | Subtle edge softening, modern compact feel |
| R4 | 4 mm | Standard credit cards, small client photo proofs | Neat, practical, protective rounding |
| R6 | 6 mm | UK portrait proofs, wedding albums, greeting cards | Industry standard benchmark, balanced curve |
| R10 | 10 mm | Large fine art prints, display panels, signage | Bold, distinct rounded design statement |
Frequently Asked Questions About Photo Corner Cutters
How do I prevent white edges when cutting photographic prints?
White burrs occur when a craft punch squeezes rather than shears the paper. To eliminate white edges, use a professional photo corner cutter equipped with matched hardened steel dies (HRC 55+) and zero-clearance shear action.
Can I use a paper corner punch on heavy 300+ gsm baryta paper?
Standard office craft punches will jam or flex on heavy 300+ gsm baryta and cotton rag media. However, commercial desktop photo corner cutters with cast metal frames easily trim dense photographic stock cleanly.
Which radius size should I choose for standard wedding photo albums?
Based on UK industry standards, the R6 (6mm radius) is the most popular choice for wedding photography proofs and albums, offering a sophisticated, balanced curve.
Ready to upgrade your finishing workflow with PageFound?
Explore Equipment — £152.99